In this article I’ll show you how to set the external memory card as default location to install android application. The following test is performed on MicroMax Funbook. The tablet comes with the internal capacity of four 4GB only. Among which to 2GB is locked and not accessible to the user. So in this article I’m going to show you how to install application directly in the microSD card so that the internal ROM is not used entirely and your operating system get enough space for updates and fresh installation.
By default android devices does not come with settings that can allow you to install applications in a microSD card. It is shocked to find that the manufacturer is not adding any kind of option which can allow us to modify the storage for installation location of application. But with the help of some basic application or hacks began said the external HD card as default installation location for android devices. It is a very basic application and it void warranty
To move ahead you will need to download a very small file from the download link I had provided below. It is just 74KB file which is actually a directory find application which tells the android devices to install application on a microSD card not in the internal storage. So first get the application and copy that in your microSD card stock will move ahead with the entire process of modifying the application installation location. Remember that you will need to route your android smartphone for using this application. So this is beneficial for heavy videogames. For example if you download a game like FIFA or assassin Creed to move easily occupy around 150 to 200 MB of internal space.
So leaving the room inside your operating system keeps on finding new update and if it is overloaded it will not perform well.
Step one:
Download directory find application. We’ll mount the external storage card as a virtual directory. It simply tells the android device that the external storage is not external it is actually a internal storage.
Step two:
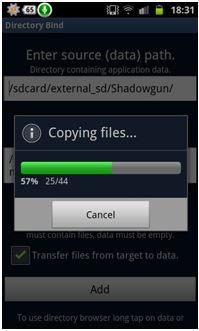
Install the application and then run it. Open the application and click on options where you can find Add New Entry. Click on that and you can see a screen that ask you to enter the source patch. This source path is required for application installation. The next is mount path. You can see in the image below what you have to add. Click on Add.

Step three:
In this you will need to find the folder that you want to move to the external storage. You can also click on new and browse to the external storage and apply the settings for installation. This menu also allows you to move the existing internal data to extend card without affecting the performance.

Step four:
It is very important that you must provide the most appropriate location or else the game will be moved to some other directory. The manual way of transferring all the application to the external storage is one of the best ways to avoid any error. Sometime you will need to move the game directory from internal storage to the external storage. And if you’re not aware about the exact location you can go on Google and find out detail information about the installation files. Just tap on any folder and select it to move like this:


Step five:
In the above two images you can see how the application are copied from internal storage to the external. So that looks a much easier job. Also when the directory’s bind properly you can see a checkmark icon next to the application which is copied. By pressing that you can enable and disable that directory binding.


