
Hey guys, I’m back again with one new Custom ROM for Samsung Galaxy Y S5360 devices. Earlier we have shown you step by step process for installing Several Mods on S5360 such as NextToICSROM Custom ICS ROM, Aura Custom ICS Rom, Android 4.1 JellyBlast ROM and more. Today I’m going to show you how you can get Android 4.2 Jelly Bean operating system on your Galaxy Y smartphone. For those who don’t know, 4.2 JB was release just couple of weeks ago with the new Galaxy S4 and is only available in few high end devices like Nexus S, S4, etc. Even Galaxy Note 2 haven’t received this update yet. But now through JellyNoid custom ROM you have Android JellyBean 4.2 OS on Samsung Galaxy Y S5360 which has never received any official ROM of Gingerbread 2.3.6.
The process for installing this MOD is relatively simple but the device looks cool. It is necessary that you follow all the mentioned information before going for the process. If your phone freezes on boot screen after installing the ROM, don’t panic; just try to repeat the process once again from beginning. If it works, it is good, and if not revert back to your earlier firmware. Remember, me or this website is no way responsible for any Damage done to your devices. If you agree follow the instructions given below.
Pre-requirements:
Like all other procedure, here also there are some requirements which need to done before we start the installing process of JellyNoid Jelly Bean ROM. Installing Custom ROM on mobile device is somewhat risky due to unstable or unofficial ROM. But this one is tested. Still I recommend before moving ahead just go through the following points to stay on the safer side.
- Backup your phone data. Backup everything. For staying on the safer side you can use ROM backup software. If the process fails or if you do not like the MOD you can use the original Stock ROM back again to put the phone as it was earlier.
- Install ClockWorkMode Recovery Tool on your mobile device. It is a tiny app that you can download and it replaces the existing Samsung Recovery Screen. After installing ClockWorkMod, your device will be rooted which is another essential part of installation process.
- Download Android 4.2 JellyNoid Jelly Bean custom ROM from the URL provided below and save it on your desktop. Remember that JellyBean is a Custom ROM. It is not a official ROM.
- Before moving ahead with the process enable USB Debugging. Go on Settings > Applications > Development and tap on USB Debugging.
- Ensure that your phone has maximum battery power.
- Ensure that your mobile is Rooted. You can find that by installing a Root Checker Application.
- Whatever changes made by you is entirely on your own risk. If you are not sure skip the process. Now if you had done with the above requirements we will move ahead with installation process.
Downloads:
Installing CWM Recovery and Rooting Galaxy Y:
Follow the link here to find the complete rooting process of Galaxy Y only if your phone is not rooted. Or else you can move ahead with installation process.
To know how you can install ClockWorkMod Recovery on Galaxy Y S5360, check this post and video. Once you had verified or done with the rooting process we will move ahead with JellyNoid installation.
Process to install JellyNoid on Samsung Galaxy Y S5360:
- First of all you need to connect your phone to PC using USB Cable. Copy the download JellyNoid ROM package to your phone’s SD Card’s root folder so that it can be browsed easily.
- If you are following the second way of CWM recovery than copy the ClockWorkMod Recovery Package as well to SD Card’s root folder.
- Now unplug the USB cable and turn off your device.
- Once turned off completely, now to boot it into recovery console, you need to press and hold the Volume Up + Home + Power Button at the same time for 10 to 15 seconds. Leave the same when you see Samsung Logo.
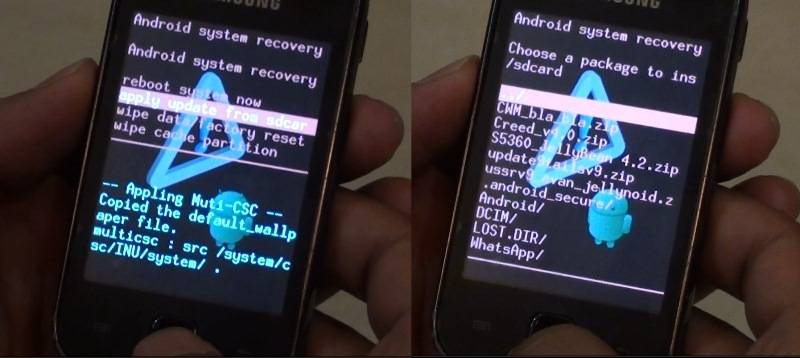
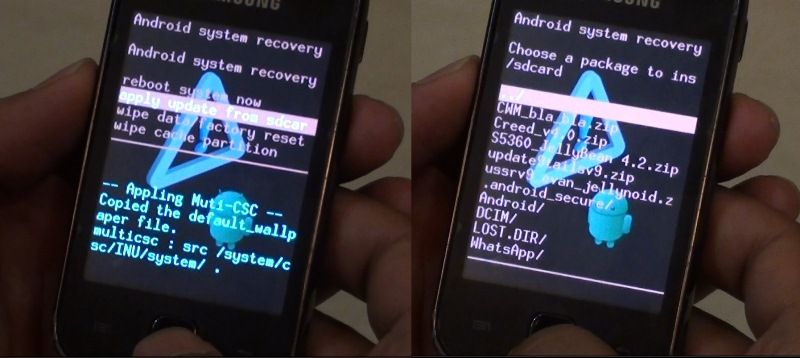
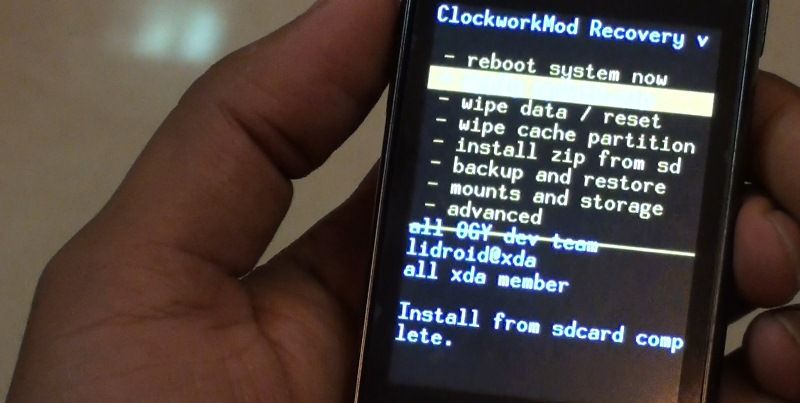
- The phone will boot in Recovery Mode. If you had installed CWM, then it will go directly to the ClockWorkMod Recovery. And if you following the second method of CWM recovery then once in the Samsung’s default recovery select ‘Apply from SD Card’ and select ClockWorkMod Recovery package we downloaded above. This is the new Kernal which replaces the original.
- If there is any problem while entering Recovery Mode like some error, Turn the Phone off and repeat the 4th step back.
- Now once you are in ClockWorkMod Recovery console, using the volume up and down keys to scroll, choose full DATA Wipe.
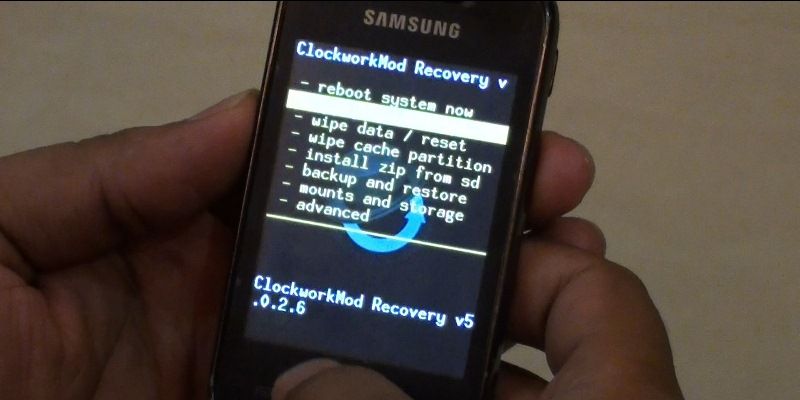
- Now select Wipe Cache Parition.
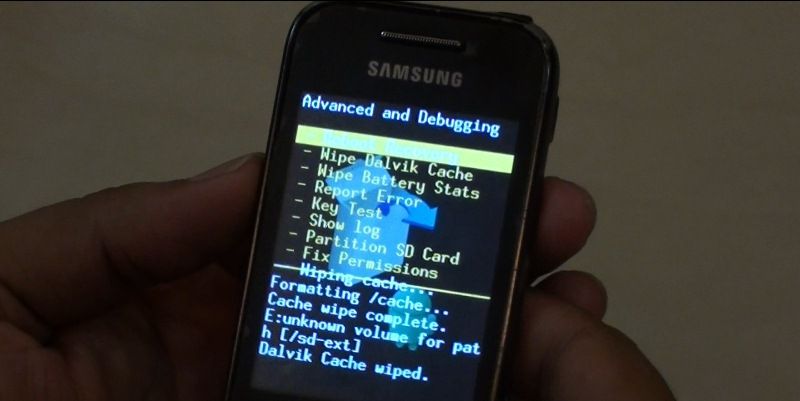
- Now select ‘Advance’ option at bottom and select ‘Wipe Dalvik Cache’
Now go one step back and select “install from SD card” option and choose the JellyNoid ROM zip file which is named as ‘ussrv9_evan_jellynoid’.
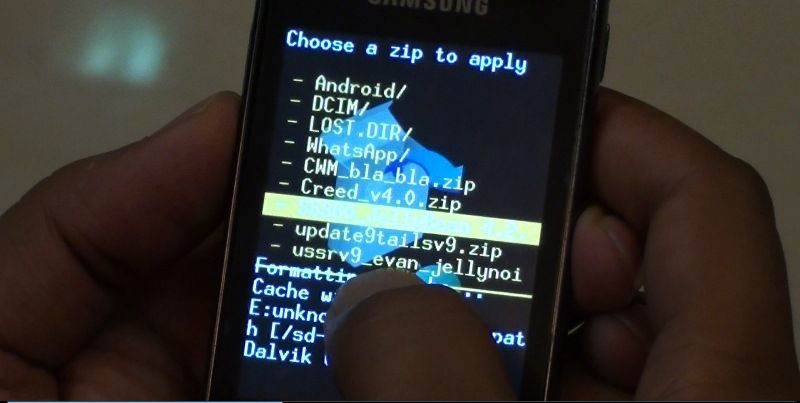
- Press the Power button to select it.
- Once done the setup will start. Wait for some time. The process with take about 60 to 90 seconds to complete.
- Once the setup is done Go back to the main menu and reboot your mobile phone.
That’s it. The installation is done now. The phone will take some time to boot and optimize the OS. If your phone gets stuck on Samsung Logo while reboot for the first time (Like my phone got stuck, you can see it in the video below) then repeat the process again from start. It happens with many custom roms that it get stuck on logo but get done after 3 to 4 attempts. Good Luck.
Please leave any comment or suggestions. Thanks.
Hey guys, here the is Video Tutorial of complete installation process since beginning of installing this Jelly Bean 4.2 MOD on Galaxy Y. If you dont understand something in above guide, you can go through this Video:


