In a world where personalized items hold more value than ever, crafting your own stubby holder can be a rewarding project. Not only does it allow you to showcase your creativity, but it also offers a practical solution to keeping your beverages cold. Whether you’re a seasoned crafter or a novice looking for a new hobby, this guide will walk you through the steps to create a custom stubby holder, complete with personal touches and professional finishes. Let’s dive into the world of DIY crafty creations.
Gather Your Materials
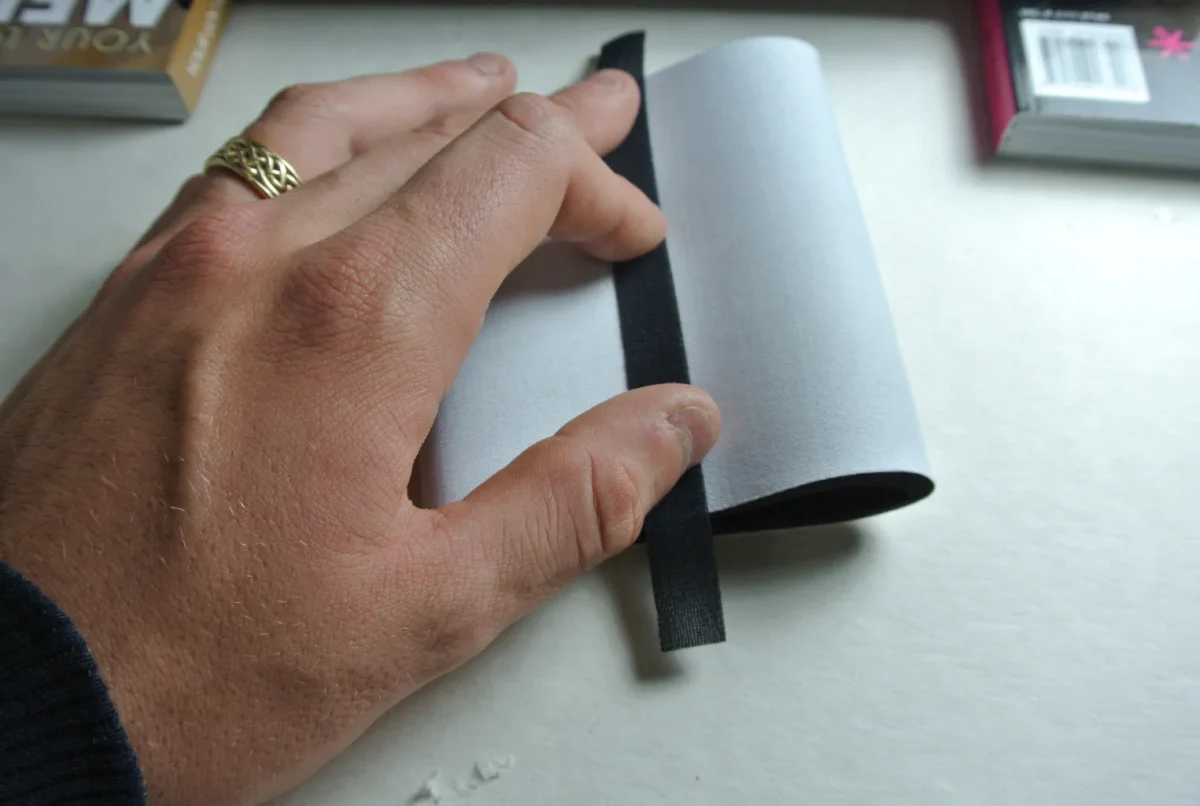
The first step in creating your stubby holder is to gather the necessary materials. You’ll need neoprene fabric, which is excellent for insulation; this material keeps your drinks cold while being durable and flexible. Also, acquire a strong thread, scissors, a sewing machine (though hand-sewing is an option), and a ruler or measuring tape. For those looking to add decorative elements, consider fabric paint, embroidery supplies, or iron-on patches. Selecting high-quality materials is crucial as they will affect the durability and appearance of your final product. Remember, the beauty of DIY is in the customization, so feel free to choose materials that reflect your personal style. If you’re searching yourself for quality products, check out Print Promotion Premium Printing for inspiration.

Measure and Cut Fabric
Measuring and cutting the fabric correctly is foundational to creating a stubby holder that fits perfectly around your beverage container. Start by wrapping a measuring tape around the container to determine the circumference, then add an inch for the seam allowance. For the height, measure your container and subtract an inch to expose the top slightly for easy access. Transfer these measurements onto your neoprene fabric using a marker, ensuring straight lines for a clean cut. Cutting the fabric accurately will ensure your stubby holder is snug yet easy to slide onto the container.
Sewing Techniques
Sewing is where your stubby holder begins to take shape. If you’re using a sewing machine, select a zigzag stitch to accommodate the stretch of the neoprene and ensure durability. Begin by sewing the shorter ends together, inside out, to create a cylinder. This seam is crucial as it will bear most of the stress when the holder is used. If hand-sewing, use a backstitch for strength. Remember, the goal is to create tight, even stitches that will hold together even with frequent use. Practicing on scraps before starting on your actual project can help refine your technique.
Adding Personal Touches
This step is where your stubby holder truly becomes one-of-a-kind. Embellish your holder with fabric paint, creating designs that reflect your personality or interests. Alternatively, embroidery can add a touch of elegance and uniqueness. Iron-on patches are another great option for those looking for an easier way to personalize their holder. When adding decorations, consider the placement carefully; you want your designs to be visible and not interfere with the holder’s functionality. This personalization stage is an excellent opportunity to experiment with colors, patterns, and textures.
Assembling Your Stubby Holder
After decorating, it’s time to assemble your stubby holder. Turn the sewn cylinder right side out and fit it over your container to ensure a proper fit. If you’ve opted for additional elements like a base, attach it using a similar sewing technique as before, ensuring it’s securely in place. This step might require adjusting your sewing machine’s tension or hand-sewing for precision. The assembly process is crucial for ensuring that your holder is not only visually appealing but also functional and durable.
Tips for Maintenance and Care
To keep your stubby holder looking its best, proper maintenance and care are essential. Neoprene is relatively low-maintenance but should be washed gently by hand with mild soap and water to prevent fading and maintain its insulating properties. Avoid machine washing if you’ve added delicate decorations. Air dry your holder away from direct sunlight to prevent the neoprene from becoming brittle or the colors from fading. With proper care, your DIY stubby holder can last for many years, becoming a staple at gatherings and a testament to your crafting skills.