PlayStation 4 is one of the best and widely used consoles when it comes to gaming. Now since apart from disk gaming we also downloaded so many digital games on our consoles drive, it takes a huge amount of storage. And if you want a huge library, you get to have a huge hard drive too.
What if your PS4 Pro drive is full and you still have so many games to add into your library? How can you upgrade your hard drive? If you are the one who is facing the same issues and want to increase the storage of your PS4 Pro without losing the game, here’s the step by step guide to do the same.
But before jumping on the process you need to do some prerequisite which is mandatory for this procedure to happen:
- A new hard drive with a maximum of 2TB storage
- A thumb drive with 1.1 GB of available storage
- Controllers Charging Cable
- USB Drive to backup your library
If you are ready with all the above stuffs, we are good to go. It is quite simple process, all it requires is your time. Although there is very less chances of loosing you game, we need to back up your library just in case any of your game is no longer available on PlayStation Store. So it will be wise enough to back it up in advance for worst case scenario.
Backing Up the Games, Accounts and Save files
Start by going to PS4 Settings > System > and select Back Up and Restore. On selecting the same, it will ask you what you want to backup.
Connect your USB drive and select the items you want to back up
After selecting the items go to ‘Next’. Here you will see the backup size. Make sure it fits in your USB Drive or you will have to either bring a bigger USB Drive or remove some items.
Once done, select ‘Back Up’. Now leave the system for a while, don’t shut down or remove the drive. You will get to know when backup is completed because the console will reboot itself.
Prepare USB Drive to Reinstall PS4 System Software
Now from your computer, go to Sony Official Website and download PS4 System Software. It is about 820 MB in size.
Create a folder named PS4 on desktop screen, under that Folder create subfolder named “UPDATE” copy and paste your file there. Make sure that you don’t rename it.
Connect USB drive; transfer your PS4 folder into a USB drive
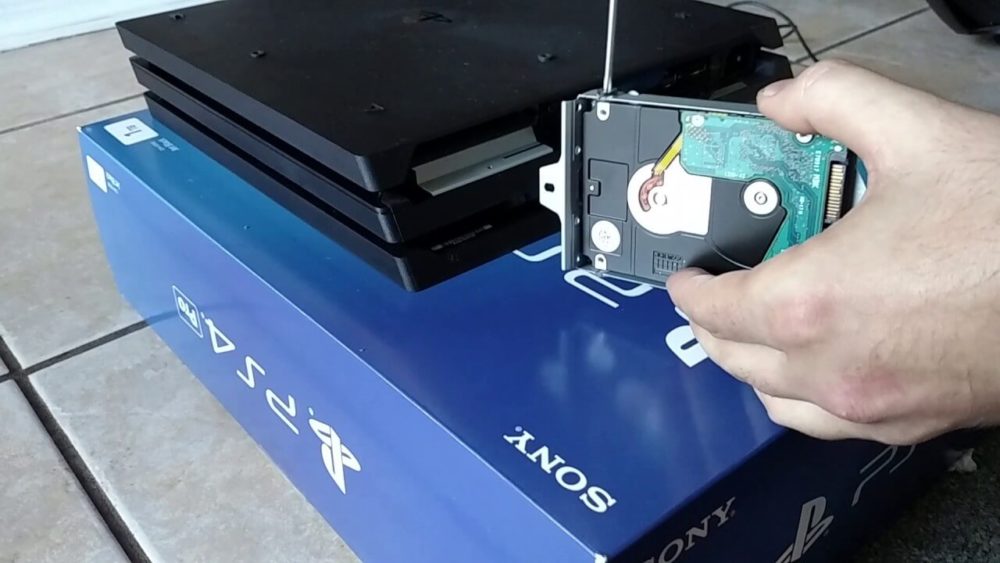
Replacing PS4 Pro Hard Drive
- Shut down your console, unplug all the cables. Pull it off the hard plastic cover which is on the left-hand side of the console
- Dismantle the hard drive tray using a good screwdriver and take out the tray out of the console.
- Now carefully loosen the screw which is holding stock Hard drive in the tray.
- Place the new hard drive in a tray and tighten the screw
- Make sure the SATA connectors will aligned perfectly then gently push back the tray to in its position
- Place the plastic cover back into its position
Reinstalling PS4 System Software
- Turn off the console, insert the USB drive in which you saved the files earlier.
- Press and hold PS4 Power button for 7 to 9 seconds to boot the console in Safe Mode
- With the help of Micro USB cable, connect DualShock controller, press the button and further select the option “[Initialize PS4 (Reinstall System Software]” by pressing the X button
- Then allow the system to update. The very first time after the process PS4 will take time to initialization of the process
- If PS4 doesn’t recognize the file name, Cross check the file name
Restoring Backed up Date to PS4 New Drive
- Sign in to your PlayStation Account
- Insert the USB drive with all backup files
- Go to Settings > System > Back up and Restore > and Select Restore PS4 option.
- Here select the items you want to Restore on your PS4 Hard Drive and select Restore. Make sure not to remove the USB Drive or shut down the console during the process
- Once done, Restart PS4.
That’s it. This is the procedure of expanding the storage and save the games in PS4 Pro


